HOW TO MAKE YOUR OWN TOILET BUNG
I first found out that I needed a 'toilet bung' when I lived in a 1930s-built flat in London that had exterior metal sewage pipes. One winter, when I was away, an extremely cold spell caused the sewage pipe to freeze in a section close to the ground, below my flat. This rendered unusable the toilet of my neighbor who was below me on the ground floor. However, the rest of the pipe was not frozen. As a result, when any of my neighbors in the floors above me flushed their toilets, the sewage went into the pipe and stayed there. Eventually the pipe filled to a level where the pressure forced the sewage through the S-bend of my toilet, into my toilet bowl, and ultimately over the top of the bowl, onto my bathroom floor, and under the bathroom door and into the hallway. It was very nasty. After this incident I did some research and discovered the solution – a toilet bung. This is an inflatable rubber bung that you push into the S-bend of the toilet bowl and inflate with a bicycle pump. This YouTube video shows the process. You can buy these for about ₤50 ($80) in the UK and other parts of Europe; but they are hard to find in the US, Canada, and Asia Pacific.
A toilet bung has three uses:
(a) Apartment buildings: prevent sewage back-feed from apartments above yours (see above).
(b) Flood zones: prevent water upsurge into your bathroom via the sewers during floods.
(c) Properties unoccupied for long periods, especially in hot locations: prevent nasty smells and bugs coming out of the toilet after the water in the S-bend has evaporated.
If you want to make a simple, inexpensive toilet bung for yourself, here's how:
1. Buy an inner tube for a bicycle tire (about $6) and a puncture repair kit ($1).
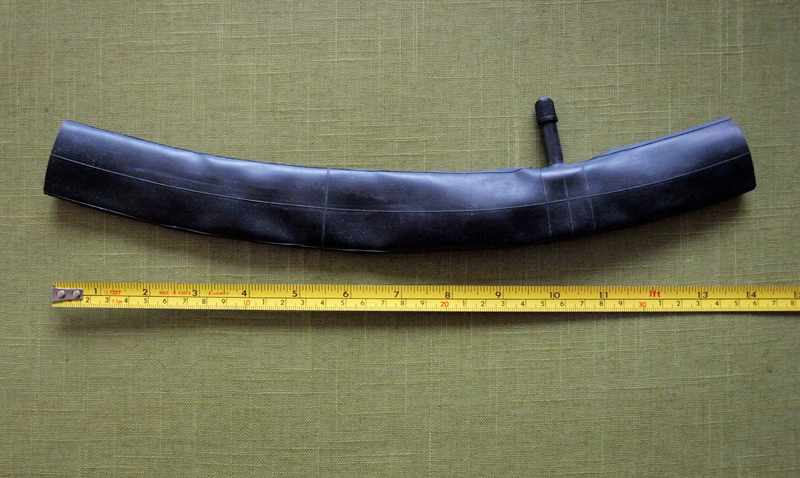
2. Cut out a 14-inch section of tube that contains the valve, cutting about 3 inches from the valve on one side and 11 inches on the other side.
3. Clean the white powder from inside of the tube, about two inches into the tube from the two ends, using a damp cloth or tissue.
4. Using the sandpaper that comes with the repair kit, rough-up the inside of the tube where you just cleaned it.
5. At one end of the section of tube, apply glue from the repair kit to at least the first inch of the area you just roughed-up, and let it cure for 5 minutes (or as instructed in the repair kit).
6. Squeeze the end flat and clamp it (e.g., in a vise) and wait for it to dry (see repair kit instructions for how long to wait).
7. Repeat steps (5) and (6) at the other end of the section of tube.
8. Inflate the bung you have just created (not too much!) and check the ends for leaks in a bowl of water. If you have a leak, cut off the glued section and repeat steps (3) to (6).
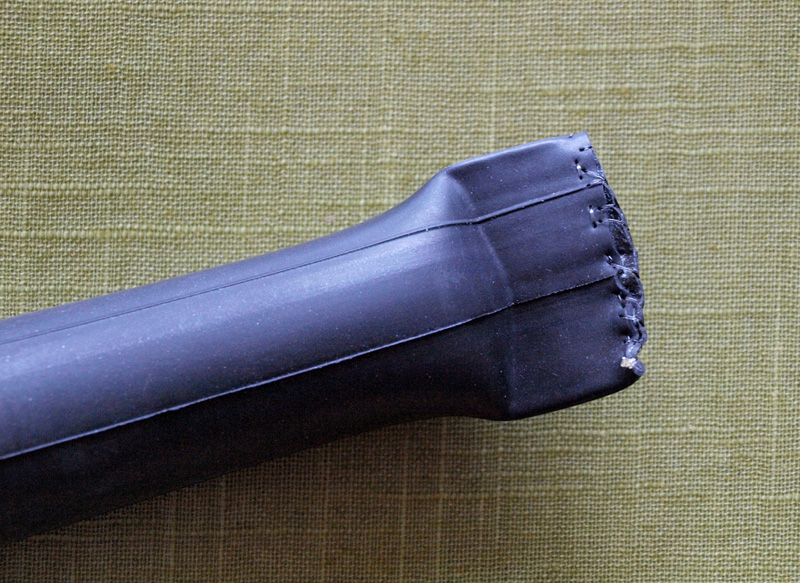
9. Optionally (probably unnecessary, but, like chicken soup, it won't do any harm): stitch the two ends using fishing line (at the very end, not in the middle of where you glued).
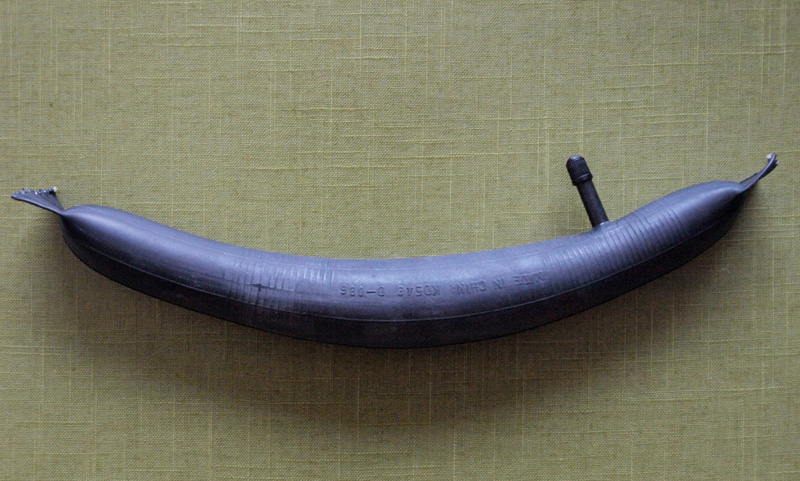
When only slightly inflated (middle picture below), this home-made toilet bung is narrower than most toilet bungs that you can buy. This is actually a good thing: some modern toilet bowls have a narrow S-bend for which for-sale toilet bungs can be a bit too fat.
Before gluing: Finished toilet bung: Optional end-stitching:
Note: To make sure that the bung does not slip out of the S-bend as you inflate it, insert the long end of the bung (the 11-inches-from-the-valve part) well into the S-bend before starting to inflate.
![]()